E

Triangulation LIDAR

RPLIDAR A1

Basic model

RPLIDAR A2

Cost effective

RPLIDAR A3

Multipoint interaction
E

TOF LIDAR

LPX-T1

AGV preferred

RPLIDAR S2

Indoor & Outdoor

RPLIDAR S3

Best performance in black objects

RPLIDAR C1

The newest model

LPX-E3

Field Monitoring
E

Mapping Solution

Mapper M2

M2M2 Mapper

Slamkit

SLAM spatial localization
E

Robot Base

Hermes

Max loadweight 80KGS

Athena 2.0

Compact and flexible

Apollo 2.0

Autonomous Navigation
E

Robot

F3

food delivery robot

H2

hotel robot

P3 PRO

factory robot

ROBOT

New Technology Added Apollo 2.0 Robot Chassis Adaptable to All Scenarios Now Available!

New Technology Added Apollo 2.0 Robot Chassis Adaptable to All Scenarios Now Available!

The robot chassis is a crucial component of the robotic system, supporting fundamental functions such as mobility, navigation, and obstacle avoidance. Additionally, it provides a “platform” for extending robotic applications, further driving the development of the industry.

When addressing diverse and complex industry application scenarios, users undoubtedly have multifaceted expectations for robot chassis: high environmental adaptability, precise positioning, navigation, and obstacle avoidance capabilities, convenient development and integration, and safe product application, among others.

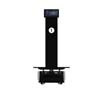
Since launching its first ZEUS robot chassis in 2015, Slamtec has been dedicated to solving the real-world challenges users encounter in practical applications. Today, Slamtec introduces the all-new “agile, all-scenario, general-purpose” robot chassis—Apollo 2.0. With innovative technology and a revolutionary navigation system, this chassis offers a highly usable solution for robot development and application, truly helping users reduce costs and increase efficiency.

Common Questions and Answers about SLAMTEC Products

Common Questions and Answers about SLAMTEC Products

一.RPLIDAR

Q: Why can’t the radar connect?

A: Please check if the corresponding USB option is selected correctly. When adding a radar connection, make sure to choose the correct COM port. For example, if you’ve plugged in a radar and it has been assigned COM4, then select COM4 in the USB options, and proceed with the connection startup.